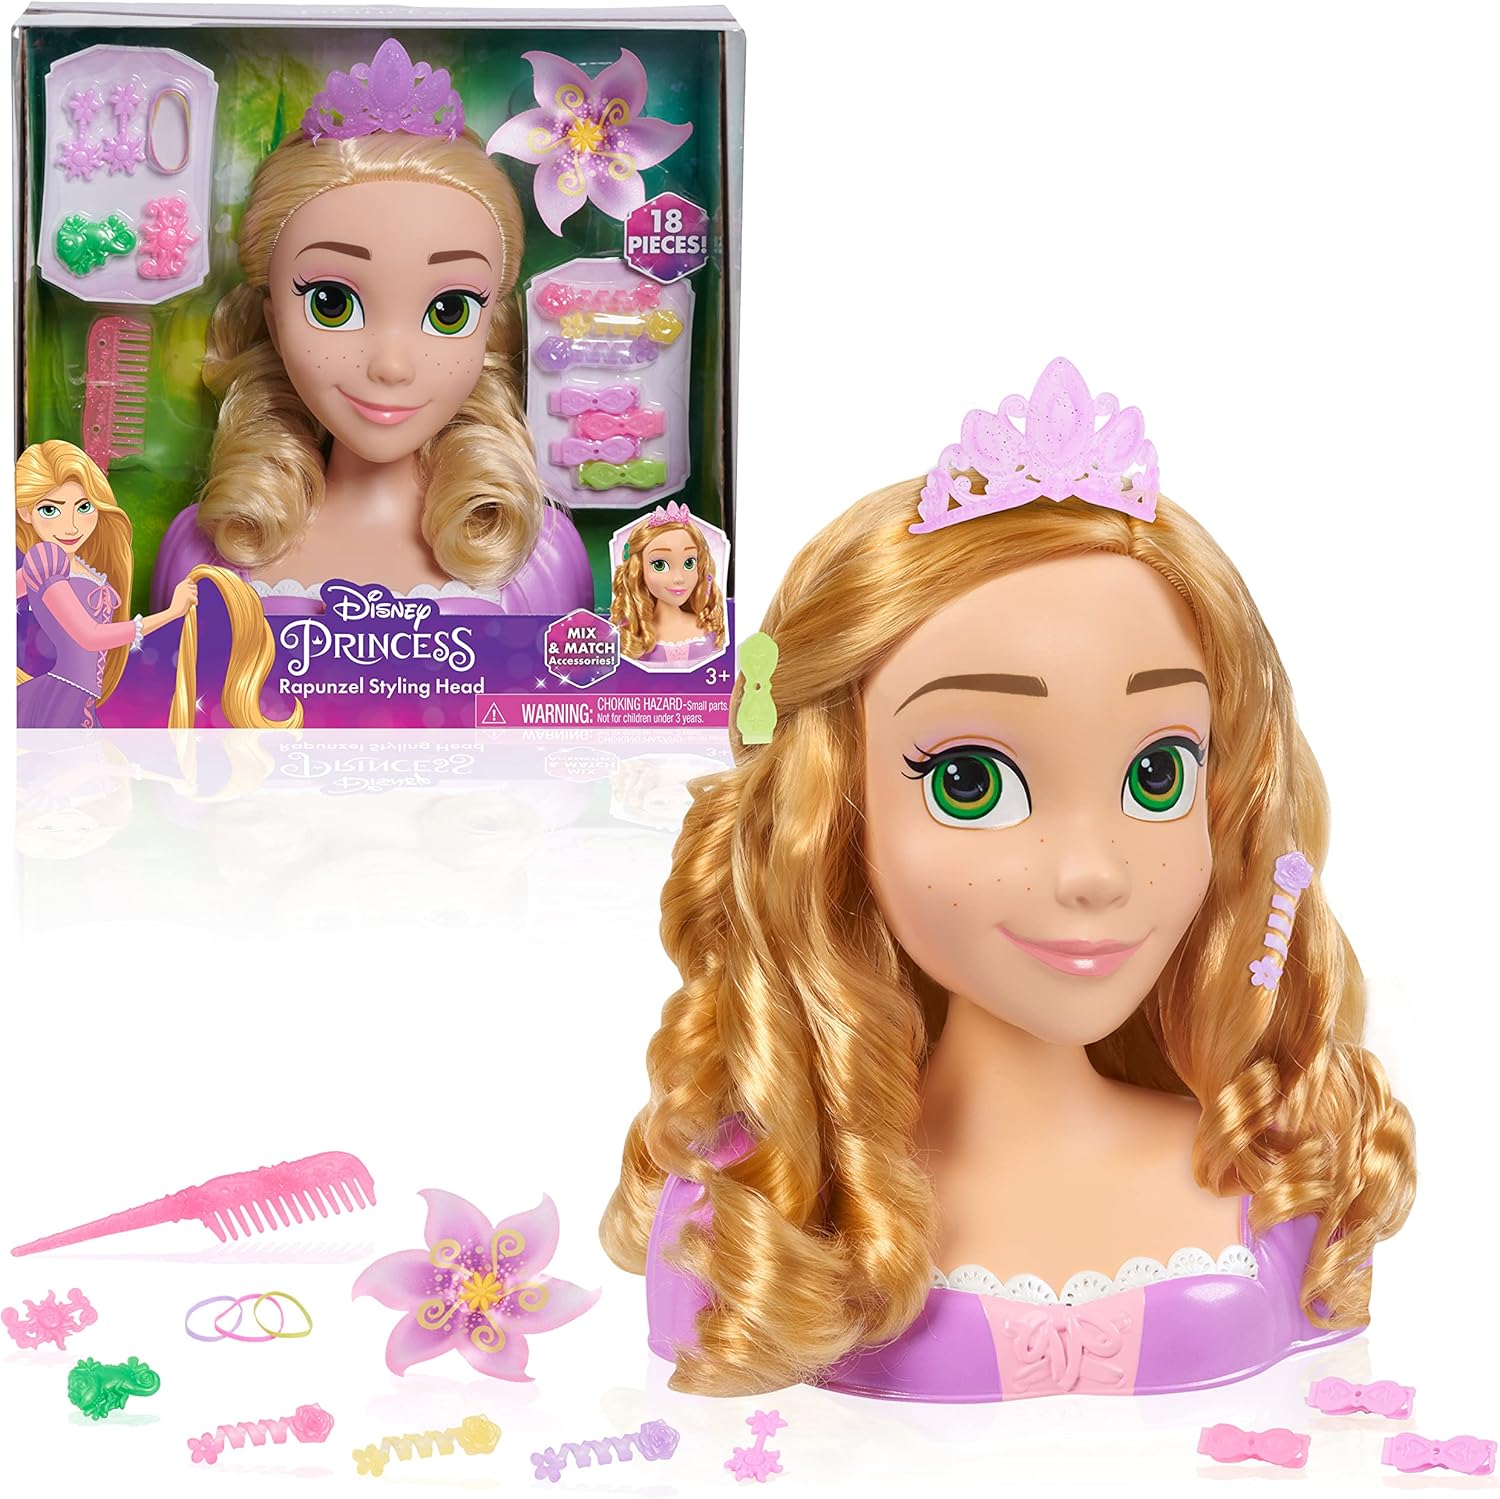
Disney Princess Rapunzel Styling Head, 18-pieces, Pretend Play, Officially Licenced Kids Toys for Ages 3 Up
FREE Shipping
Disney Princess Rapunzel Styling Head, 18-pieces, Pretend Play, Officially Licenced Kids Toys for Ages 3 Up
- Brand: Unbranded

Description
As with any face part, lips come in many shapes and sizes. Younger characters can have narrow lips; older or more conventionally beautiful ones have big and full lips. Males usually have very subtle lips, with no outline and barely any pigment. The good news though? You can channel your inner Cinderella, Ariel or Belle by creating Disney princess hairstyles. After all, updos and braids fit for a princess are always fit for you, no matter the age, occasion or moment. Not sure where to begin? Don’t get your hair in a knot: here are five super-simple – and super-stunning Disney princess hairstyles for everyone in your kingdom: Mini Minnie Mouse’s Style There is no such thing as a universal set of Disney body proportions, as each movie has its own style, but we can create an estimate. These statements seem to be true most of the time: The area above the crotch and the area under it are at least equal in height. This proportion can be modified to make the character look taller or slimmer.
The breasts, if present, are placed around the halfway point of the chest, and they're usually small to medium size. But eyes can move independently from the rotation of the head, right? Let me show you how to achieve this effect. Draw the curved diameters of the eyeballs, adjusting their shape to both (imaginary) ends of the motion. This may require some practice to understand, but once you get it, you'll never have a problem with drawing eyes again! The same will happen to the diameters of each circle—in the front view, they will be straight, and in the side view completely curved. The in-between stages must be estimated according to this rule. The hairline starts usually at 2/3. Start your hairstyle here. It should be voluminous and lifted from the head, so it's good to start it with a strand wrapping the forehead. The mouth can show many emotions, and it's easier than it looks! You should simply start with a curve/two curves showing the shape you want to achieve, with the bottom of the lower lip marked.The inside of the mouth needs to be drawn sometimes. You can draw teeth, tongue, or nothing at all—look at yourself in the mirror to decide which combination will be the best for the expression you want to portray. Draw the nose and the lips. Remember to consult your references to make sure you're drawing them in the right place! I'm a Polish artist with a great passion for creating new things—whether by drawing, digital painting, or photo manipulation. Mark the distance of the eyes—there should be space for three of them. Leave a thin band of empty space on both sides of the head. We’re completely envious of Rapunzel’s hair and all of its luster. With a little effort, you can recreate the beauty yourself, no scaling your roots required. For this, you’ll need elastic hair ties and a few small, fake flowers. Go on now, let down your hair and get started:
However, I can give you a tool for drawing every existing Disney character by modifying the rules we've just learned. I'll use Elsa from Frozen as an example, but you can use your favorite character for this exercise. Step 1 Eyes are the most important part when it comes to showing the emotions of a character. You can achieve various emotions by rotating the eyes, putting the eyelids low or high, changing the side of the iris/pupil, and, most easily, by changing the shape and position of the eyebrows. You can learn more about drawing facial expressions from these tutorials: I'll use the pose from the previous exercise, this time adjusting it to the specific proportions of Elsa's body. To find the correct proportions, I used this process: The base for the whole head is a sphere. It can be elongated or flattened later, but it's always safe to start with a sphere. It represents the cranium. To keep the size and the placement of these parts constant, they should be based on the sections that can be found on the sphere (e.g. 1/3, 2/3, 1/2, etc.). Currently, the most popular "recipe" for cute princesses seems to be:photo courtesy Kayley Melissa YouTube: https://www.youtube.com/watch?v=uigT67t25v0 Rapunzel’s Daytime Wonder Although drawing is about lines, lines are only the end result of placing a 3D object into a flat surface. This means that if you want to draw something from imagination, you must be able to imagine the 3D object first, not the lines. So let's take a look at how a Disney-style head is constructed, so that you can create a visual model of it in your mind. In the front view, all three eyeballs (two real + the imaginary one) are placed next to each other. In the side view, they cover each other perfectly. All the views in between will be some in-between stages: Of course, the nose is more than just the tip—it curves towards the eyebrows. However, the part in between is usually ignored, to keep the face smooth. For males and realistic females, the lower part should be bigger than the upper part (though usually still bigger in males).
Let's draw the lips now. They don't lie flat on the face—in the side view, you can see them between the nose and the chin. Mark this line. Draw the curve of the lips now, depending on the expression. They can be placed at 2/3 of the lower half of the face.Draw the "edges" of the hairstyle. Imagine the hair as a fabric that flows gently down from the head. You don't have to draw these lines in any view except side view, but it's good to remember about them during rotation. Outline the shape of the face in the final way. Keep in mind that females usually have round or pointed faces, while males tend to have sharply defined jaws. Step 2
As I mentioned before, each movie uses a slightly different version of Disney style, so it's not possible to create universal guidelines for all characters. Describing them all individually would also make this tutorial huge and indigestible. I have 10+ years of experience in using Adobe Photoshop and Adobe Illustrator, both for graphic design and for creating unique works of art as well. I hold a degree in graphic design, but nowadays I work as a freelance illustrator and a tutorial author. I specialize in creating realistic art, especially of animals, and I'm good at designing imaginary creatures in a realistic way. I'm a big fan of dragons and feline creatures! As you already know, a flat drawing of a head is a rendering of something 3D, and it's the same with the eyes—they're spherical, not circular. If you only draw your faces in the front view, you can ignore that fact, but if you want to draw any other views, it's crucial to understand how the eyes' position changes.
True: we would all enjoy the fairytale lifestyle, complete with fancy parties, fairy godmothers and castle living. Also true: a very small population is born or marries into royalty, so you might not earn that princess title in your lifetime. Now that you know the anatomy, let's practice the proportions in a more practical way. We're going to draw a generic Disney princess with the universal proportions I've just described.
- Fruugo ID: 258392218-563234582
- EAN: 764486781913
-
Sold by: Fruugo