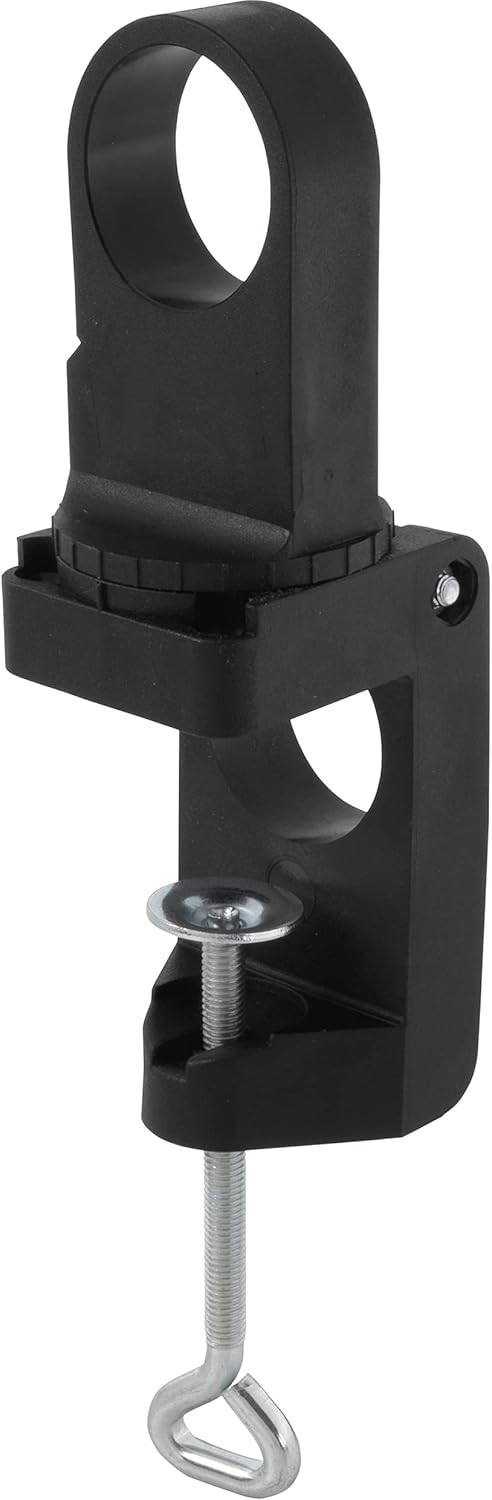
wolfcraft Universal Drill Clamp, Plastic, Rotatable I 4802000 I For power drills, milling and grinding motors in horizontal and vertical position
FREE Shipping
wolfcraft Universal Drill Clamp, Plastic, Rotatable I 4802000 I For power drills, milling and grinding motors in horizontal and vertical position
- Brand: Unbranded

Description
Now, it's fair to mention that the ones I bought fit very neatly on a 3/8" carriage bolt (it's 1" in diameter). If you plan on using a 5/16" or 1/4" carriage bolt to match the nut you implanted into the toggle clamp, you might have to do a little more searching for a rubber solution. You might try a rubber tool dip if you aren't able to find a small enough rubber furniture tip, or even scrap the carriage bolt completely and go with a threaded rod of the same size with a pre-drilled hole in a rubber stopper. The safety clamps basically come in three different types, and are manufactured by various companies around the globe. The most common name on the drill floor is “Dog Collar”. Once the shoulders are removed, we'll do something that will keep the toggle anchor from skidding off the ridges of your drill press table: we'll make notches exactly where the ridges are. Now, we could measure these things out...but I like working with patterns and allowing objects I'm working with to print themselves, giving me a more exact, less mistakable procedure. So what do I do? Once we've found a rubber solution to the business end of our bolt/threaded rod, we'll head on over to the next step.
clamps - Odfjell Technology The correct use of safety clamps - Odfjell Technology
No, no, this isn't a shameless plug for another of my videos, this is a technique that has saved my hiney in more ways than I can count.
Be the First to Share
Usually the safety clamp is used until sufficient weight is reached in the string. This will vary according to tubular specs.
Clamps | Woodworking Tools | Screwfix
Do not ever use a safety clamp as a hoisting device. This device was not build for lifting and is not rated as such. The handles on the clamp are for manual handling, not to be used as pad eyes. Understanding the operation of the slips will make you understand the purpose of the safety clamp. Why do we use it in our daily operations on the drill floor, whether we run Drill Pipe, Casing or Tubing? The safety clamp shall be used for an entire string if the Casing/Tubing/Drill pipe is flush, meaning no upset or coupling.
No banging on the clamps, please!
When we speak about safety clamps, we can divide them in three categories. The smallest size being a “T” Type, the intermediate & larger sized clamp is type “C” and there is the “MP” type which stands for Multi-Purpose. The “C” & “MP” type overlap each other in sizes, however the “MP” is generally heavier and harder to handle. Do not use a safety clamp in combination with automated slips. This does not create a safety factor but becomes a hazard. When using automated slips, and you install a manual safety clamp, you will risk major equipment damage should you encounter an impact. Even though Company Rep’s might insist in using the clamp in this configuration, it is strongly recommended not to do this. The “G” clamps are NOT constraining workpiece, they’re just increasing the friction between the work piece and the platform in the hope that it’s enough friction to prevent rotation – hope you didn’t spill any drilling lubricant or oil there. Okay, if that's not understood, please leave me a comment and I'll try to dive deeper into this subject for you, although I'd probably have to create a video to show what I'm talking about...
Drill Attachments You Probably Didn’t Know About! 19 Cool Drill Attachments You Probably Didn’t Know About!
If you are or have recently been stressed then there is a much higher risk, stress is an indicator of increased cognitive load. The tool is perfectly suited to Dremel rotary tool models 400, 398, 395, 300, 285, and 275. Since Dremel is such a popular brand, consumers will want specific accessories that work perfectly with their Dremel power tools. I suggest buying a 3/8", 5/16" and 1/4" size toggle bolt. They're relatively cheap and are good to have around the shop anyway. So what we'll do is use a little paint and paint wide enough strips under our drill press table, on the ridges, that will be long enough to place our toggle anchors onto. We'll press the anchor onto the ridges and make sure that the bolt is in the center. Once the paint has been transferred, we'll want to remove about an 1/8" of metal so that the ridges on the underside of the drill will fit in the anchor. Again, you can do that with either a file or a grinder. Let's start this instructable off with a question: How do you clamp materials to the drill press? Or don't you? Look buddy, I'm not judging, trust me, I'm not. I've got my own safety demons that stare at me while I'm welding in shorts and flip flops. One of these days, we'll learn though, right?An ideal drill guide for all the rotary tools in the market today. The easy to use guide has a lever to adjust height and is heavily preferred in the manufacturing industry.
RS PRO Drill Clamp | RS
Again, as I have highlighted in the blog on slips, avoid mixing parts from one manufacturer with the other, even though they might seem compatible. Warranty on the tool is gone, and as tolerances on the parts might slightly differ, you could end up in a world of hurt.
Oh, but what do we slide the jig 'in to', you might ask. Well, I've got a few example pictures listed above as well as a link to show you what your jig will need to have to add this clamp. So we've put our 1" Forstner bit in our drill press. Now let's take the 2" x 9" x 3/4" piece of hardwood and we'll drill two holes in it. The first will be the 1" hole (we all want to start large and go small with Forstner bits), followed by the 3/8" hole. The 1" needs a depth of a 1/2" while the 3/8" will drill the rest of the way through. I have made a few drawings in sketchup that will give you the exact dimensions. Also consult the video as it will give you all the information you need. Beyond that, we're going to fit a nut into the bottom end of the toggle clamp by carefully grinding out a channel for our nut to fit into. We'll fit it to the underside without fear of it being jarred loose as upward pressure will keep it in place. Besides just the upward pressure, we'll use some sort of metal epoxy mixture to glue it into place. Now, I've made a couple of these (one with the metal epoxy and one welded), and have to admit I'm more partial to the spot welded nut, but the epoxied nut hasn't failed me yet. Part 2 is now finally taking shape, be proud of yourself! No, this isn't complicated...but it always puts a lump in my throat to complete something and being able to say, "I did that!" Now it's time to complete this instructable and call it yours.
- Fruugo ID: 258392218-563234582
- EAN: 764486781913
-
Sold by: Fruugo