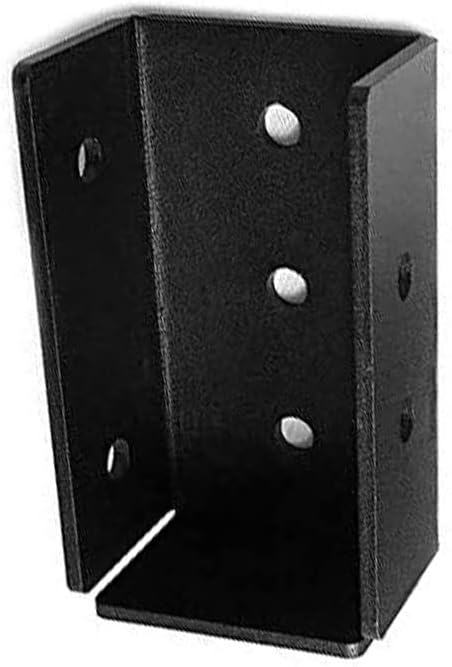
Framola Extra Strong British Made Timber Rafter U Shape Bracket - One Piece Solid Steel Indoor Outdoors Rafter Brackets - Durable and Rustproof - Black (4" x 2")
FREE Shipping
Framola Extra Strong British Made Timber Rafter U Shape Bracket - One Piece Solid Steel Indoor Outdoors Rafter Brackets - Durable and Rustproof - Black (4" x 2")
- Brand: Unbranded

Description
The Galvanised steel will ensure excellent resistance to corrosion when used outside in Pergola structures. A truss, on the other hand, is only made up of 2x4s and is often pre-fabricated in a factory. Trusses use “webs” of 2x4s within the truss structure to support the roof. Trusses are held together with steel gussets and are staples of home construction. Types of Shed Rafters A hip rafter works in tandem with a common rafter, but when used, it creates a more visually appealing roofline but creates less interior space. Both trusses and rafters can be used to create the roof of a building. While they function similarly, they have unique differences that affect how they attach to the supporting walls. If you aren’t using a ridge beam, then you’ll want to use plywood gussets to reinforce the connection at the apex of each set of rafters. For an 8×10 shed, one sheet of ⅝” plywood should be fine.
I hope you were able to get some good information from this article in terms of how to build rafters for a shed and how to install them. Remember, there are many different ways to do these projects, and I’ve attempted to give you a way to do it cheaply, yet safely, while staying within budget. We’ll be using a ridge beam for this project, so each set of rafters will meet a horizontal 2×6 at the apex, which will run the length of the shed and connect to all of the rafters. Let’s begin by comparing these two different roof styles. Rafters are beams that run from the peak of the roof to the top plate of the supporting walls. They join at the peak of the roof by connecting to the opposing rafter or to a ridge beam that runs the length of the peak of the house or shed. Rafters are installed piece-by-piece during the construction of the roof. Simpson Strong-Tie also offers another style, which attaches to the front of the top plate and the side of the rafter. As with the other style, these connectors offer convenience as well as strength. Line them up and drive your structural screws into each of the ten predrilled holes.
Framola™ Extra Strong Timber Rafter Bracket
As the name suggests, these handy connectors are typically used to attach rafters to the ridge beam at the peak of your roof. They work just as well to connect rafters to top plates. They work especially well with a lean-to shed. If you look at the rafter span chart, you’ll notice that 2x4s can be used for rafters on spans up to 11 ½’. Anything beyond that you are looking at using 2x6s for most sheds. Tools and Materials Needed to Build Shed Rafters Tools Now you have a piece of 8” x 48” plywood. Use this piece to mark out the rest of the plywood. Now you need to cut your smaller piece into three triangles. Starting at one long edge, mark off points every 8”. Now do the same on the other long side. Connect the dots so you have three triangles, each 8” high and 16” long. Rafters typically use larger wood beams and do not have any sort of framework other than the beams themselves. A rafter beam is usually larger than a 2×4 – large homes may have rafters that are 2×12 or more! After all, it’s the job of the walls to hold the roof up. This prevents the rafter from potentially shifting, causing your roof to sag, or worse, collapse inward.
There is no standard spacing – it depends on what size of rafters you want to use, and the span of your shed. For instance, #2 grade 2x4s at 16” on center will span just over 9’. If you get premium, kiln-dried lumber, then you could span 10.5’ with the same size of lumber and rafter spacing. As with rafter installation, use an 8d nail, making sure that about 2/3 of the nail length ends up in the wall plate. Make sure to toenail on both sides of the truss on each end. Use three nails for 2×4 chords, two on one side and one on the other, and four nails for 2×6 chords, two on each side. 2. Twist Strap While this article won’t go into great detail about all the factors that go into determining the upload rating of a roof, which includes everything from the span of your roof to the type of lumber you use, we will discuss which attachment methods are stronger than others.
Remove the braces you made for the ridge board. Once out of the way, you can go ahead and install connectors on the ridge board. You’ll use the same type of connectors you used on the other rafters, except that you’ll cut one wing off – the one on the exterior shed side. Use a circular saw to cut them out. Use the finished gussets as templates to mark out the rest of your wood, and cut accordingly. Then use a measuring tape and measure from the furthest, top point of your first cut. Make a mark and use your speed square just as you did the first time. Cut the Birdsmouth Joint Do not install the ridge board to rafter connectors on the ends of the ridge beam yet – you will do this at the end. Make a Ridge Beam Brace
For additional support, you can use ceiling joists, which are lengths of lumber that run from the end of one rafter to another. 1. Toenailing Each side of the gusset will be 8” long, but only 8” tall. Layout your sheet of plywood on sawhorses. Facing the long side of your material, measure down from the top edge 8”. Then draw a line across the width of the plywood from that mark. Use a circular saw or jigsaw to make the cut. This notch allows the beam to rest flush onto the top plate. Is it necessary? While you may be tempted to avoid the admittedly tedious process of making birdsmouth cuts in each rafter, don’t do it. I use a jigsaw to make this cut, although a handsaw or circular saw works, too. If using a circular saw, you can make your cuts, flip the wood over, cut out from the other side, then use a finishing handsaw to remove the rest. Or you can just use a handsaw and cut slowly.Lastly, if you live in a place with heavy, wet and regular snow, then consider your load. Consult the heavy load table, which has different values for lumber sizes, spans, and rafter spacing. How to Install Rafters on a Shed Using an 8d nail, drive each nail in at about a 30-degree angle with a distance from the joint so that about 1/3 of the nail length goes into the rafter and the remaining 2/3 into the wall cap. There are many good options to consider when determining how to attach your roof to the walls of the structure you’re building. Toenailing is one of the more straightforward methods of attaching rafters or trusses to the top plate, while hurricane ties offer superior strength to ensure your roof stays where it belongs. Hip rafters, when used, are beams that sit on two or all four corners of a shed wall and extend upward to meet the ridge beam. They extend diagonally so that one end, or both, of a rectangular shed roof, is slanted perpendicularly to the gable roof in the midsection of the shed.
Before we get started, it’s important to consider why attaching your roof, be it a truss-style or rafter-style roof, to your structure is such a critical step in the construction process. It’s important to understand that not all the methods we will discuss in this article are equal. For similar reasons, you should also consider using collar ties if you plan on using rafters. A collar tie is a length of lumber that attaches to each opposing rafter near the peak, preventing your rafters from spreading apart. Collar ties also take the stress off of your wall plate and rafter joint. Once you’ve outlined either rafter, flip them over. You’ll have a triangle. This isn’t the exact cut you need to make, however. You still need to take a speed square and extend the vertical line you drew to the bottom of the underside of the rafter. Unlike rafters, which are installed piece by piece, trusses are installed after they have been completely assembled. This means lifting and placing an object that can weigh hundreds of pounds depending on the size of the roof you are constructing.Your last rafter won’t be exactly 16” away, so your last two will likely be closer than the others, which is fine. After you’ve marked where each rafter will go, it is time to install the top plate to rafter hurricane tie connectors. Be sure to place them so that the notch opening is flush with the top plate of the walls. They are installed so that they will be nailed to the interior sides of the top plates.
- Fruugo ID: 258392218-563234582
- EAN: 764486781913
-
Sold by: Fruugo