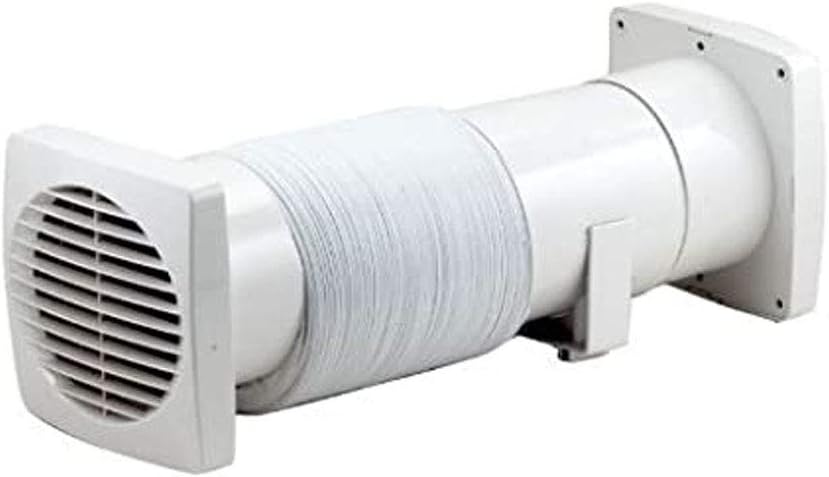
Marley Bathroom Extractor Fan 5 Inch 5" In-line Ventilation Without Timer Flexible Ducting Kit Included Wall or Ceiling Mounted Kitchen Bathroom Shower Wet Room WC
FREE Shipping
Marley Bathroom Extractor Fan 5 Inch 5" In-line Ventilation Without Timer Flexible Ducting Kit Included Wall or Ceiling Mounted Kitchen Bathroom Shower Wet Room WC
- Brand: Unbranded

Description
Extractor Fans with an integral timer or timed switch need a 3-core and earth supply to allow the unit to run on after a light is switched off. Next, the fan itself needs to be installed. How this is done will depend entirely on what type of fan is being installed. It must also be possible to isolate the fan by means of a pull cord switch inside the bathroom, or a fan isolation (3-pole) switch outside of the bathroom. When wired to its own switch, the switch itself will either be located outside of the bathroom, normally above the door or it can be inside as long as it’s in the correct zone and is a pull cord switch.
As with all electrical work, before anything is done at all, make sure that the circuit being worked on is fully isolated in the fuse box or consumer unit. To do so, either pull out the fuse or turn off the MCB. Once the fan is positioned, the next task is to get it wired up. A suitable length of cable is cut to run from the 3-pole switch out to the fan. This wiring diagram shows an easy to follow configuration for a bathroom extractor fan fitted with a timer, that’s not going to be turned on by the existing light switch. Instead, we are going to install a new switch that will turn the fan on and off. For completeness we will also cover how a standard bathroom extractor fan is wired up to it’s own switch and not an existing light switch. Wiring a Timed Extractor Fan That’s Turned on by an Existing Light Switch Once capped over any chases are then filled using a suitable type of filler or plaster. Once dried it can then be sanded flat with the surrounding surfaces and then finally painted.
🍪 Privacy & Transparency
If this is in a ground floor bathroom, you may need to pull up some floor boards to access and wire up. If you are using a standard 3-pole pull cord switch, the switch is generally fixed to the ceiling and wired down from the top. However, this is normally when it’s being installed in an upstairs bathroom and there is decent access to the top of the ceiling from the loft. If however an axial fan (one through the wall) is being installed this will need to go on an outside external wall. As with the steps above, either a shower isolator switch is used that is normally installed outside the bathroom above the door or it’s possible to use a 3-pole pull cord switch that is usually installed in zone 3 inside the bathroom.
In terms of each end when installing an inline fan, you will need both internal and external extractor fan vents. A larger diameter hole (stated in the instructions) is drilled in the ceiling above the shower, bath etc. and the vent is inserted and fixed up after the end of the pipework is fixed. The same is done at the other end in a suitable location to vent the moist air, normally through a soffit closer or fascia board. If installing an inline fan, this will need to be positioned and screwed down to a flat and level surface, ideally between the point that air is being extracted and then being expelled. As there are several different ways that a timed extractor fan is wired up, here we will cover the most common method; Taking a power feed from an existing bathroom light. From the fused connection unit the installation must then have a 3-pole isolation switch that provides at least 3mm of separation on ALL live conductors when the switch is off.Before anything is done at all the very first job is to isolate the power to the circuit you will be working on! This means pulling out the fuse or turning off the MCB for the lighting circuit the bathroom light is getting power from. As we have stated above, if an extractor fan is being installed from scratch then this will need to be done by a qualified Part P registered electrician. However is you are simply replacing an existing broken unit then you are able to do this yourself. When connecting up, its necessary to ensure the brown is connected to the permanent live terminal in the junction box and the common (C) in the switch, and the blue cable (sleeved brown as it is not being used as a neutral but as a live conductor) is connected to the SL (switched live) terminal in the junction box and L1 in the switch. An extractor fan is an essential part of any bathroom as it helps to remove the excess moist and humid air produced by the shower and keep any condensation build up to a minimum. The other end is connected to the timed fan terminals as stated by the manufacturer in the instructions provided with the unit.
Despite this, if you are unfamiliar with working on and around electricity then you are better off getting the pros in to do it for you! Wiring a Timed Extractor Fan Switched on by its Own Switch
Types of Bathroom Fan Switch Configuration
As it’s in a bathroom, although it’s not required, the belt and braces approach is to fit a 3-pole isolation switch so that all potential live points; permanent live, switched live and neutral are isolated when the switch is turned off. For both different types of units they can also be tuned on and off through normally 2 different means; they are either wired into the light, so that when it’s turned on the extractor comes on also or they have their own dedicated switch, normally as an isolator outside the bathroom above the door or inside as a pull cord switch. There are other ways to achieve this where the junction box connections are housed within the 3-pole isolation switch, but that is more complicated to explain and increases the chances of something going wrong. The 3 pole switch ensures complete disconnection of supply to the fan so that maintenance can be carried out safely, without the need for a qualified electrician to disconnect the wiring (N.B. if you are in anyway unsure of how to carry out routine maintenance/cleaning on the fan, you should always seek the advice of a qualified electrician).
If you are installing an inline fan then you will also need to install the associated pipework that will carry the moist air from the source to the outside. Once isolated, the next job is to install the fan isolation switch/3-pole switch. Where this is done will depend on the switch you have.When connecting up the pipework make sure that you first tape the pipe to the fan body using aluminium tape and then also screw up a large jubilee clip around the pipe. This will ensure a full and compete seal. Finally, connect the pull-cord switch that wil be used to turn the fan on and off into the junction box using normal 2-core cabling as with any other light switch. In terms of zones and where a switch can be fitted, this is generally best done in an area of zone 3, but you have to ensure that the correct rating of switch is also used, but your electrician will know for sure what to use. Tools and Products Needed to Wire a Timed Extractor Fan
- Fruugo ID: 258392218-563234582
- EAN: 764486781913
-
Sold by: Fruugo