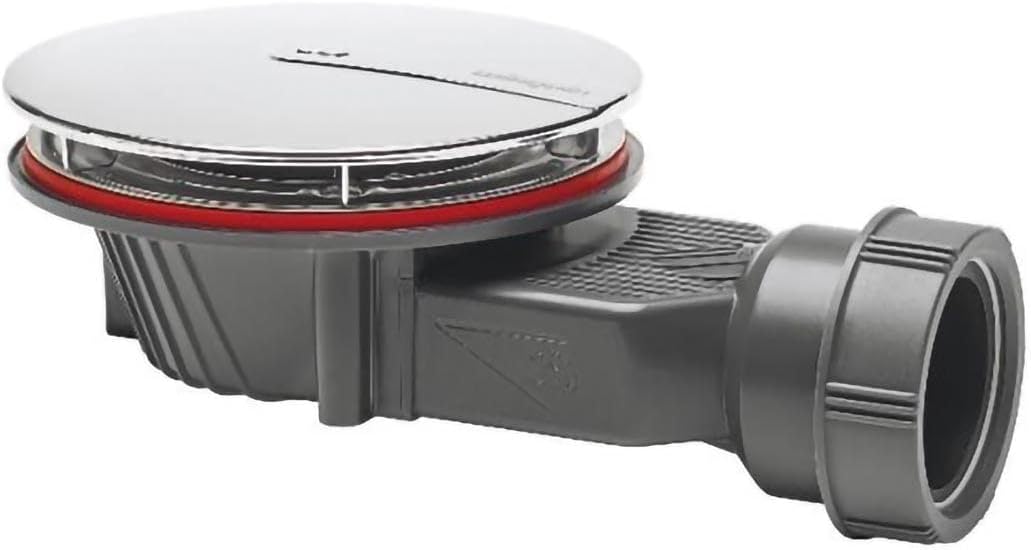
Wirquin Slim Extra Flat Low Profile Shower Trap Waterless Membrane For 90mm Dia Shower Trays
FREE Shipping
Wirquin Slim Extra Flat Low Profile Shower Trap Waterless Membrane For 90mm Dia Shower Trays
- Brand: Unbranded

Description
As we had to replace most of the floor area that the tray would be sitting on, this gave us the opportunity to ensure that the floor would be totally flat and level for the tray to sit on.
Shower Tray | DIY Doctor How to Fit a Shower Tray | DIY Doctor
Simply drill a 57mm hole in the soil pipe, coat the inside face of the boss with silicone and clip it in place. Once marked, remove the tray and put it to one side and then cut out the waste hole. In this case we cut a 6 inch hole to allow the waste to sit nicely with a slight gap around it. With the tray removed it was also obvious that the floor was badly damaged, so this was also cut away and then damaged joists were also removed and replaced.A small channel was also cut at the front of the hole as the waste connection protruded out of the waste by a few inches. Due to the damp damage to the walls we had to remove quite a few tiles, not only as they were loose, but also to replace the damaged sections of wall.
Low Profile Shower Trays - Stone Resin Shower Tray Low Profile Shower Trays - Stone Resin Shower Tray
Once the tile adhesive has cured, you can then get some grout in there. Use a suitable sponge to force the grout in to the joint, making sure it’s fully filled with no gaps. Tips on grouting can be found in our project here. The first job is to remove the old tray if it’s still in place. Depending on how it’s fixed, this can be fairly straightforward or a bit of a nightmare. Tighten it so that it is “pinch” tight e.g. tighten it as much as you can by hand and then one final turn to pinch it up and seal it. You don’t need to over tighten it! Fitting or installing shower trays can be a DIY job but the utmost care must be taken to ensure that the tray is both fully sealed, waterproof and also totally level on the base it’s sitting on once it’s in place.In this case we used a prying bar to gently lever the front of the tray up by gently working your way around the front edge, loosening it as you go. As the tray was old, the adhesive was beginning to fail so after a little work it came away easily Before replacing any sections of floor a good idea is to test the waste and make sure there are no leaks. Using a jug, fill the waste up and continue to pour water it (a second helping had would be good here).
Low Profile Shower Trays Low Profile Shower Trays
The first job is now seal up the gap between the shower tray and the wall. Using some suitable sanitary silicone, run a bead around both edges of the tray that butt up to the wall and then dampen your finger and use it to force the silicone down into the joint and then leave to cure. The shower tray waste trap was then fixed in place on the tray. This was just a simple matter of unscrewing the top section, positioning the main cup section and seal under the tray and then screwing the top section and seal down. Use your sealant gun to force the sealant into the joint so that it’s fully filled and then dampen your finger and run it over the surface to both smooth it off and force it fully into the gap. You’ll need to cut out an access hatchin the floorboards next to the tray as this will allow you to reach the waste. A jigsaw is the ideal tool for this as it’ll allow you to be more precise with your cutting. Step 3 - Cut Waste HoleAfter removing the old tray it was found that a long term leak had caused a fair amount of damage to the walls and floor that would all need to be replaced before the new tray was installed in place. By tiling down to the tray and leave a 2-3mm gap between the tiles and the tray you can fully seal this with silicone and allow for any expansion and contraction as the silicone itself will absorb this and reduce the risks of any leaks. To tidy things up, attach your shower tray side panelsto the tray to create a flush look. These should be really easy to attach, just pay attention to any instructions you get with the product. Step 6 - Seal It! On first inspection of the walls it was apparent that many of the tiles had come loose also so all of these were also removed. As I’m sure you can imagine, digging up a solid concrete floor to trace an existing shower waste pipe to a main drain, moving that pipe to a new position or running a new pipe and then covering it over is a fair amount of work.
- Fruugo ID: 258392218-563234582
- EAN: 764486781913
-
Sold by: Fruugo