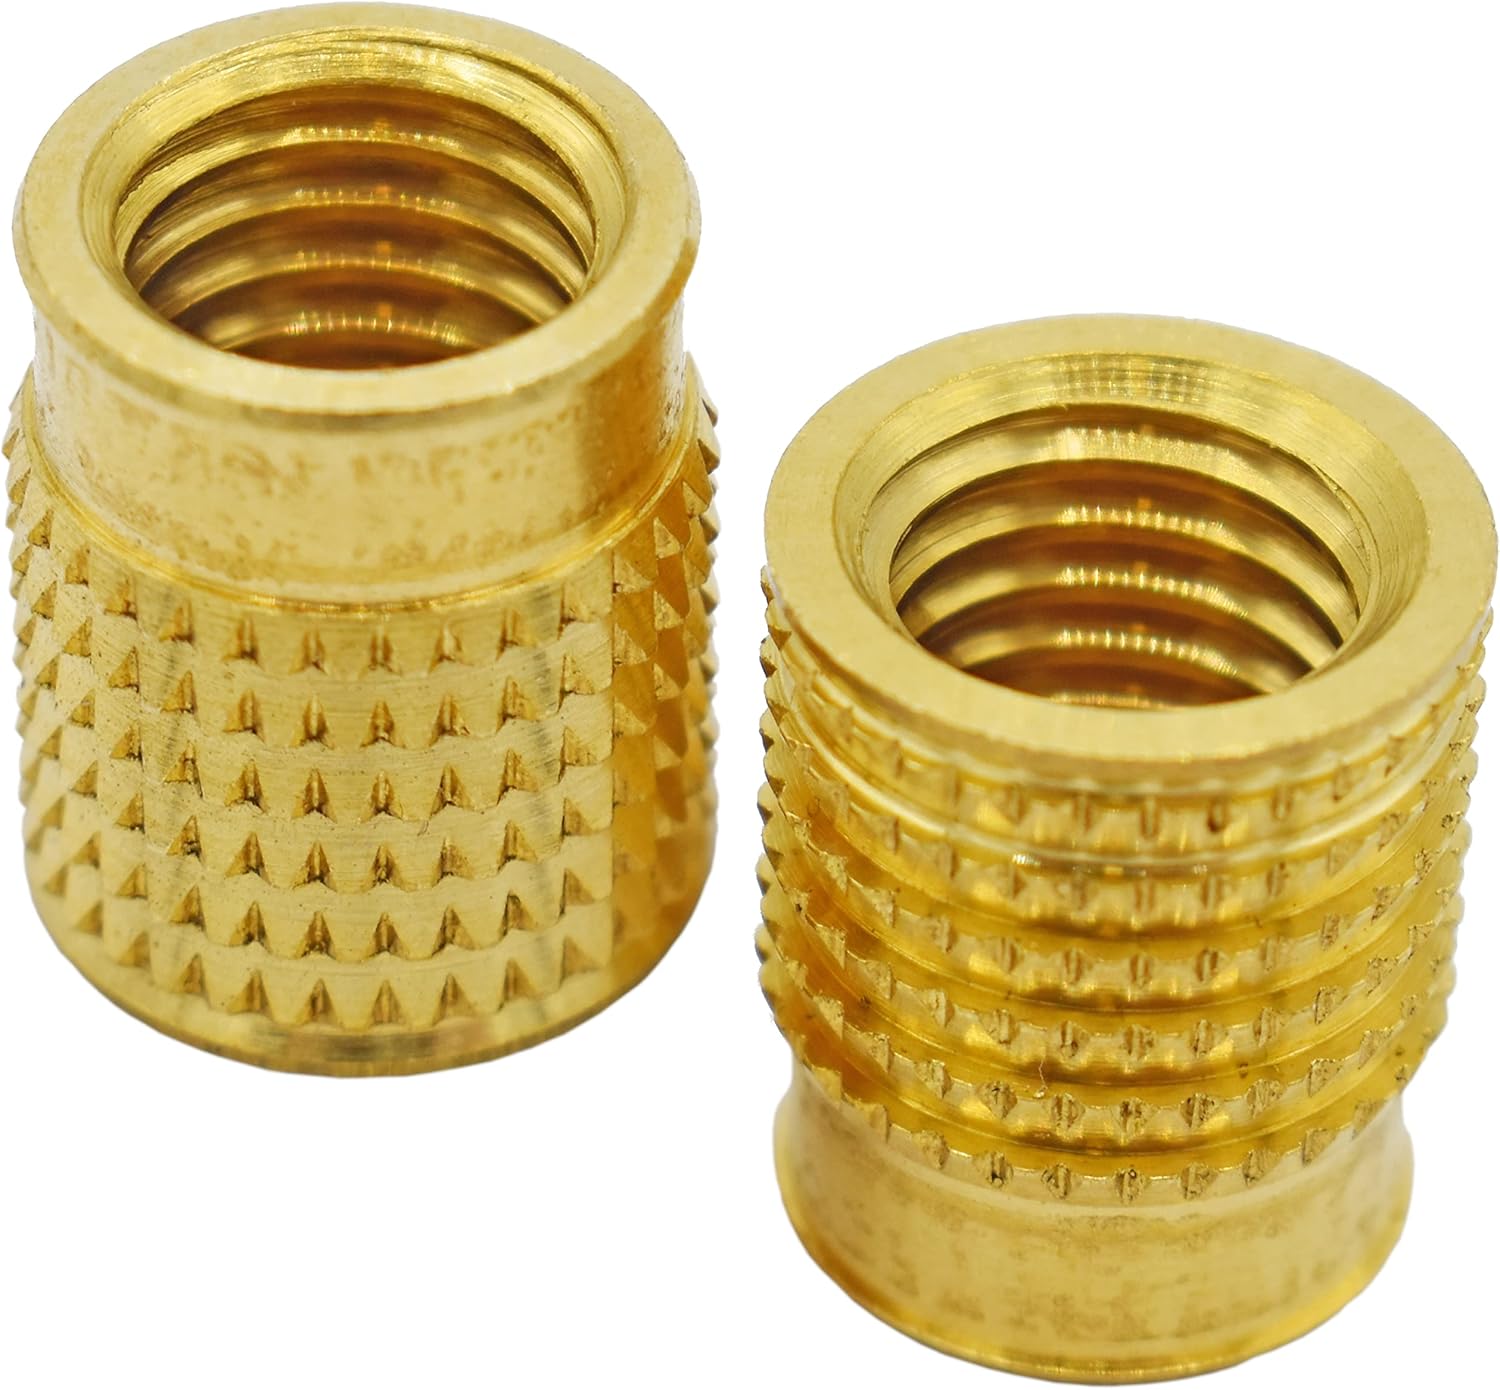
Pack of 5 x M3 x 4.1mm Threaded Brass Inserts for Plastic
FREE Shipping
Pack of 5 x M3 x 4.1mm Threaded Brass Inserts for Plastic
- Brand: Unbranded

Description
Today I’d like to share some tips on one of my favorite functional 3D-printing techniques: adding heat-set inserts. As someone who’s been installing them into plastic parts for years manually, I think many guides overlook some process details crucial to getting consistent results. We can make our 3D-printed parts even more capable when we start mixing them with some essential “mechanical vitamins.” By combining prints with screws, nuts, fasteners, and pins, we get a rich ecosystem for mechanism-making with capabilities beyond what we could simply print alone.
Make no mistake; there are a handful of insert guides already out there [ 1, 2]. (In fact, I encourage you to look there first for a good jump-start.) Over the years though, I’ve added my own finishing move (nothing exotic or difficult) which I call the Plate-Press Technique that gives me a major boost in consistency.
Designing for Inserts:
Coil inserts (HELICOIL®) and key inserts can provide a more durable thread in softer materials. We can machine ins ert ready threads, these can be selected using our interactive quote. This final step of the process seems odd, but it’s critical for two reasons. First, it seats the insert so that it’s both vertical and completely flush with the top of the printed part. Second, it flattens any bulging material that flared up while we were installing the insert.
If one of SPIROL's standard Threaded Inserts does not meet your needs, our Application Engineers will work with you to design a custom Insert to meet your unique requirements. If all went well, you should have a nice-looking insert that’s flush with the part surface. In the image below, I used the iron to seat these parts most-of-the-way in and then cooled them flush with the plate-press technique. Heat/Ultrasonic Inserts are designed for post-mold installation in thermoplastics. Heat and ultrasonic installation of these Threaded Inserts yield outstanding performance results. Available in long and short variations, long for maximum torque and pull-out resistance; short for less stringent requirements with the benefits of lower cost and reduced installation time. For threading on turned parts simply model the nominal diameter; there is no need to model the threads. Other guides suggest adding a small taper to the hole feature. This is a nifty feature that enables inserts to seat themselves into the hole before installing them with heat. Some inserts are themselves tapered, which has the same seating effect on an un-tapered hole. Adding this tapered feature (or buying the slightly-more-expensive tapered inserts) isn’t necessary, but it does make the installation process easier. Slicer Settings:Next, with the insert positioned in the hole, apply heat to the insert. Let the weight of the soldering iron tool itself apply the gentle force needed to push the insert into position. Gravity should be doing most of the work here. This process takes about 10-15 seconds. Keep applying heat until your insert is about 90% seated into your part. Press-In Inserts are installed by simply pressing the Insert into a molded plastic hole. Ideal for use in softer plastics, Press-In Inserts provide a reusable thread to meet the tightening torque requirements of a threaded joint. SPIROL's Press-In Inserts are available with or without a head, and offer moderate pull-out and good torque resistance. With a design ready-to-go, I’d recommend tweaking one 3D-printer Slicer setting first, namely the perimeter layers. Slic3r defaults to two perimeter layers for hole features. I’d recommend bumping this value up to at least 4 perimeters for two reasons. 4 perimeter layers for added structure and reduced sink marks We can only support modelled threads larger than M12 or UNC ½”-13 (½” Unified Course by 13 Thread Per Inch (TPI)) or greater – they will be milled using a ball cutter.
Larger, oversized threads can be 3D printed from polymer materials, however, typically these components have high friction, poor tolerances and wear over time. Smaller, metric sized threads are generally too fine to 3D print. Metal alternatives for threads outperform thermoplastic materials used with 3D printing. Therefore, tapping or machining a thread after 3D printing is less durable than using a threaded insert. + Can you remove threaded inserts? Heat-set inserts incorporated within 3D printed parts create a durable fastening. Typical applications include electronics housings that require integrating with off the shelf components, two part cases that need a secure fastening and repeatable access. + How are threaded inserts installed? On parts that require externally milled threads, you must design the threads on your part. We manufacture your design using flat and ball end mills. It is not the preferred method for producing threads, but can be useful for producing ¼ turn fasteners or helical and camming features.SPIROL offers a variety of Threaded Inserts for Plastics to meet your performance and installation requirements including Press-In, Self-Tapping, Heat / Ultrasonic and Molded-In Inserts in standard thread sizes ranging from M2 (2-56) to M8 (5/16-18) – depending on Insert type. SPIROL provides general design guidelines to help select the most appropriate Threaded Insert for your specific plastic assembly. Each application has unique considerations such as the specific plastic type in which the Threaded Insert will be used, torque and tensile requirements, corrosion resistance, temperature requirements, and installation methods. What is the minimum thread depth? Our software will recognise threadable holes that have a depth of at least 1.5 x thread pitch. Occasionally part features or fixturing will obstruct the thread tools, if a hole cannot be threaded we show this by omitting the thread on the interactive quotation. Thread milling is more reliable than manual tapping, but for the best results thread depth is regulated to about 2.5 times the thread diameter (refer to maximum depth in the table below). Don’t worry if your hole is longer or shorter, here’s how our software will design your thread:
Heat-set inserts work by softening the surrounding material as they’re being installed. Once installed, removing the heat-source causes this molten plastic to re-solidify around the inserts’ knurled feature, holding it in place. Let’s consider thinking about this process in terms of heat transfer. Installation holes are smaller than the inserts themselves (they’re undersized), so we can’t install inserts by hand force. Rather, we first heat the insert and then conduct that heat into the surrounding material such that the hole deforms, accommodating the larger shape of the insert. First, we want to make sure that our installed insert is still “grabbing” onto material after we install it. An installed insert displaces material outwards during installation, so adding layers improves the odds that we haven’t melted through it upon installation. Adding a counter bore will enable the thread tool to reach further. A counter bore, or countersink, is also a great Design for Assembly (DfA) feature. External threads can be milled, this normally only works well for larger threads, as these will be milled using a ball end cutter (M4 is the absolute minimum, but ideally M12 and above). Your thread will have radii in the root, so might need cleaning up with a die. We can mill most custom threads or helical forms that you can model – on the lathe, 5-axis mill or 3-axis. External 3-axis milled threads are produced on the half diameter. The part is then rotated 180 degrees, re-referenced, and the other half milled. Self-Tapping Inserts are installed by rotating the Insert into a molded plastic hole. Driven by its internal thread, Self-Tapping Inserts either cut or form their own threads during installation into the hole. Self-Tapping Inserts can be used in both thermosets and thermoplastics.To accommodate displaced material, I suggest increasing the hole depth by about 50% of the insert length. This change ensures that the displaced plastic has somewhere to go and doesn’t fill up the cavity where the insert should be. The two main categories of plastics suitable for Threaded Insert installation are thermosets and thermoplastics. Thermoset plastics, once formed, undergo an irreversible chemical change and cannot be reformed using heat and pressure. These plastics are tough and heat-resistant. Examples of thermosets are Bakelite, epoxies, urea and polyester resins. Heat/ Ultrasonic Inserts are not suitable for thermosets since this type of plastic can not be reformed. Thermoset plastics require the use of Molded-In, Press-In, or Self-Tapping Inserts. You can find inserts on McMaster-Carr (pn: 92160a115) or on Tindie. (I admit that I use the McMaster-Carr one for 4-40 and M2.5 inserts, but also with M3, M4, and M5 inserts without any issues!) We will also supply and fit a range of standard metric HELICOIL® inserts, with a thread length of 1 × thread diameter (D), 1.5D and 2D. If you require fitted inserts, let us know by using the special instructions button on your quote; please include insert length and location information. SPIROL’s Inserts are designed to maximize and balance rotational torque and tensile (pull-out) performance. Attention to knurl and thread quality further enhances performance. SPIROL offers a comprehensive line of Threaded Inserts for Plastics to suit the installation method, plastic type and performance requirements of your specific application.
- Fruugo ID: 258392218-563234582
- EAN: 764486781913
-
Sold by: Fruugo