About this deal
As with all of the other pieces of clothing for this costume, step one was to make a really rough prototype. I basically laid my arm on a piece of fabric and traced the basic shape. I cut it out and used my awesome wonder clips to clip it on to get the right fit. My wife assisted in trimming off excess fabric where needed. Final test fit before the real thing. I used two whole cans for the sword and hilt. Depending on your piece and desired finish you may not need to be as obsessive about it as I was, but I learned you can never sand too much from my buddy Eric Jones at CoreGeek Creations (seriously, he loves to sand). Once I was happy with my base finish, I sprayed a couple of coats of metallic paint–silver for the blade and gold for the ring on the hilt. It was so shiny, I actually saw spots for a while after taking this photo. For anyone who doesn’t know, Princess Mononoke is one of my favorite films, so it was a no brainer for me when deciding on my next cosplay that I’d try Ashitaka.
Princess Mononoke Cosplay - Etsy
Plant Friends Bundles | Terrarium Figurines | Cute Glow in the Dark Plant Accessory | Plant and Terrarium Decoration At the same time, I cut the dowels for the arrows and stained them to make them look more natural. I then used my Barge cement to glue the feathers to the shafts. Once they were dry, I cut pieces of excess kite string and, using white glue, wrapped and glued them down to the shafts above and below the feathers. I then mixed up some purplish paint (I don’t know where purple feathers come from, but that’s what color they are in the movie) and painted the feathers. Once I had a good coat of purple on each one, I then added some white paint to lighten it a little and then brushed on some highlights to make them look more realistic. I suggest varnishing before the next step to protect the paint from scratches and scuffs. Originally, I used glossy varnish to seal in the mask (since glossy varnish was the only varnish I could find) but I hated how it made my mask look so unnatural and super shiny. I just applied a thin layer of paint over it and the mask was nice and matte again. :-)When watching the beloved Studio Ghibli film, Princess Mononoke, one of the most memorable characters is undoubtedly Ashitaka. His unique look, including his bright red sleeves, has become iconic and has left many fans wondering: is there a name for Ashitaka’s sleeves in Mononoke? The answer, surprisingly, is yes! Ashitaka’s sleeves are known as hakama, a traditional Japanese garment that usually consists of a pleated skirt-like piece worn from the waist to the ankles. While the sleeves are a modern variation of the traditional hakama, they remain a staple of Ashitaka’s signature look and have become beloved by fans around the world. I’ve managed to fix several of these things since that first wear, several of which I think really helped me with clinching the win at RenCon. Chop chop! For con safety and because I didn’t need it to have any significant draw weight, I also heated and bent the entire length of the pipe so that there is just enough give in the bow that I can pull the string and have it look realistic, but not enough that it really has any throw strength. I’m not sure what kind of wood this is supposed to look like, but it matches the movie pretty well.
Princess Mononoke Costume - Etsy
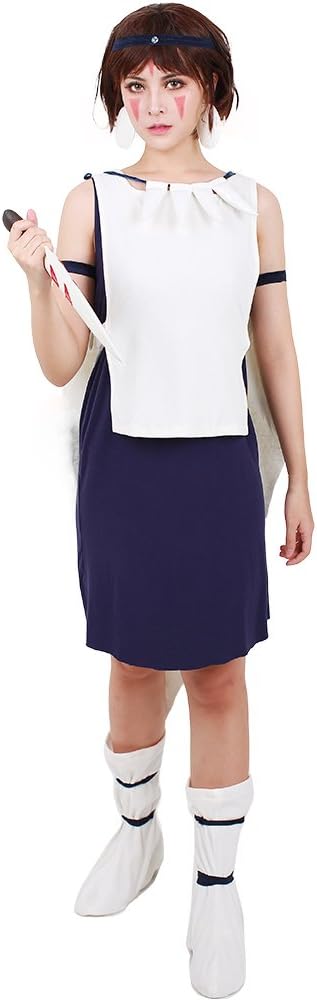
Get a white tank top, and cut off the bottom to the length that you like. I cut it to just above my navel, taking into account the length of my dress. Slit the sides, cutting off the seams to just below the hemmed sleeve. The tunic will be held together by this little bit of hemmed fabric. If you want, you can cut it all the way through and add cords to tie the tunic together exactly like San's, but I preferred this method. Make little holes in the mask with your knife. Insert the tip of the blade into the mask and twist it, boring a hole. Do this all around the mask. Don't worry about the white bits, you can always paint over them.Kodama Sweatshirt - Fantasy Tree Spirit Elf Pullover - Gift for Her 21st Birthday Unisex Long Sleeve Blue Cyber Costumes, Cyber Mermaid Costume Men, Armour Costume Men, Cosplay Costume Men, Rave Costumes For Men, Festival Bodysuit, Rave Wear Apologies again for not having more intermediate steps but after I had the PVC shaped, I gave the entire thing a light sanding for better paint adherence, primed it, and then coated it with a matte spray paint that was the color I wanted. I then cut a strip of 2mm craft foam and glued it to the bow with Barge to make the grip. Once it was glued down, I hit it with the heat gun to give it a more worn leather look. Again, using the techniques I learned from Bill Doran’s prop-making book, I weathered the bow and grip to make it look a bit more realistic (this photo is from before I did the weathering). I then coated the whole thing with a matte clear coat to help protect it from scuffs and dings. Okay, I’m not Robin Hood, but I was very happy when my arrow actually flew across the yard.
Princess Mononoke Mask - Etsy Princess Mononoke Mask - Etsy
I recently mentioned how I won first-place at RenCon for my Ashitaka cosplay. Over the past year, I had published several work in progress articles over at GeekDad.com about my process for making it–everything, head to toe (yes, even my shoes) was scratch built by yours truly. Below is a slightly edited, combined version of all of those posts. If you like these write-ups, please consider joining my Patreon to get early access to tutorials, videos, work in progress pics, and more! Much of the technique for the knife comes from Otaku Crafts, http://www.otakucrafts.com/2012/09/princess-mononoke-san-cosplay-mask-and-knife-progress/ Mix some yellow and tan for the decorative details. I first applied plain, unmixed yellow but I found that the color was very flat and thin. After adding some tan, it was precisely the shade I wanted. Don't worry about being a little messy, you can clean up the details later. The language is Japanese. As a result, tomorrow will be brighter. By naming your son this sunny Japanese name, you can encourage him to always look for the good side of life. When you hear the words Ashitaka, you might think of Princess Mononoke, in which Prince Ashitaka refers to brighter tomorrow.
I wrapped some red suede-like cord around the stone tightly to hold it in place. I was a little scared of it falling, though (Labradorite isn't the hardest stone) so I um... cheated a little by affixing little bits of tape to the cord and stone. Crude, but I didn't want to risk my stone. Shoes: This is something I could have improved on. I opted to wear brown leather boots since I'm a little on the small side and would like to appear taller. But these shoes look nothing like San's hide mocassins.... I decided to hand-make the feathers for my arrows out of 2mm craft foam. My first attempt at cutting realistic feathers was okay, but I wasn’t happy with it so I started over and tried to make the cuts more organic looking. I alternated the scoring on each side of the feather, only cutting all the way through at the very tip of each score. I then hit the feathers with my heat gun. Using a heat gun on scored foam will cause the lines to pop, which, in this case, gave it that split feather look along the top. They aren’t that realistic, but they sure do look good. In addition to fixing the above mentioned things, here are a handful of things I didn’t do in version 1.0 that I want to do in the future.
Ashitaka from Princess Mononoke Build - Billythebrick Cosplay Ashitaka from Princess Mononoke Build - Billythebrick Cosplay
Embroidered Studio Ghibli Princess Mononoke Champion TShirt, Studio Ghibli Shirt, Princess Mononoke Anime Tee, Anime Tshirt, Oversized ShirtCustom Melody Music Box / Personalized Music Box with a Custom Metal Melody Mechanism / Convert your Song to Music Box Mix your paint colors for the base layer, the main color of San's mask. I mixed a 3 parts bright red, 1 part magenta, 1/2 part tan, 1/2 part yellow and a twinge of dark brown. The dark brown goes a long way, so I added a little at a time until I got the color I wanted. Of course, you can mix the colors any way you want, depending if you want a brightly colored mask or a slightly dull one like mine. Remember your paint proportions in case you need to mix some more later.
Related:
 Great Deal