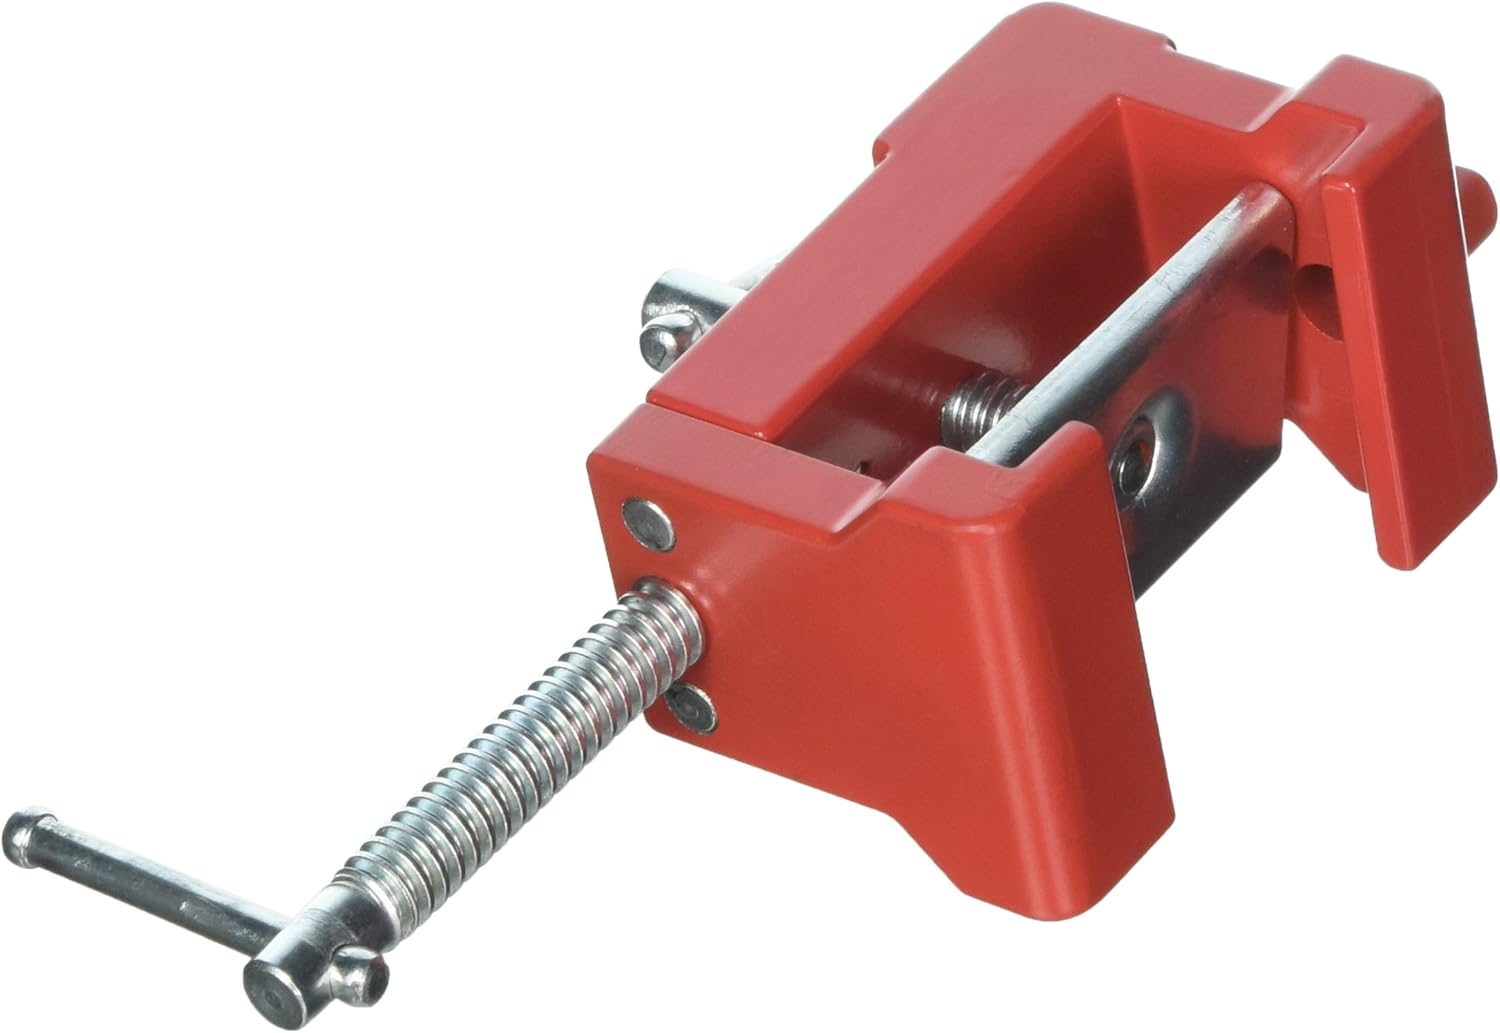
Bessey Cabinetry Clamp, Face Frames, BES8511, Pack of 2
FREE Shipping
Bessey Cabinetry Clamp, Face Frames, BES8511, Pack of 2
- Brand: Unbranded

Description
All manufacturers offer filler strips to match the wood type and finish of their cabinets. Generally they’ll offer widths about 3, 6 and 8 in. cut in the same lengths as the height of the cabinet face frames. They fill spaces between end cabinets and walls, create additional spaces between cabinets or between cabinets and appliances for drawers and doors to clear, and close up odd gaps (Photo 4). Some tools for cabinetmaking are complex and expensive. They’re difficult to afford and master but, once learned, they make the work much faster and more accurate. Other cabinetmaking tools are smaller and simpler. They require far less cash output to acquire. However, there are certain tools you need to make your own cabinets. Here’s a rundown on must-have cabinetmaking tools. 1. Clamps Scribes are must-have cabinetmaking hand tools that let your mark wood or other materials, so you have a clear pattern for cutting, drilling or other operation. Scribes are excellent for transferring a known pattern to a surface destined to mate with it. In cabinetmaking, you’ll regularly use your scribe to trace and transfer irregular shapes like existing walls to new cabinet and counter joints. Find that spot with a straight 8-ft.- long 2×4 (or shorter to fit between the end walls if needed) and a 4-ft. level. Rest the 2×4 with the level on top about 1 ft. away and parallel to the wall and shim the 2×4 until it’s level. Then mark the highest spot on the floor and repeat near any other walls that’ll have cabinets. Continue until you find the highest spot. If you have two high spots, rest the board on both and find the highest one. Measure up the wall behind that spot exactly 34-1/2 in. (standard cabinet height) and mark the wall at that point. Using that mark as a starting point, draw a level line along the walls wherever base cabinets are planned (Photo 1). Forstner Bits: Every cabinet maker needs quality Forstner drill bit sets. They let you make various sized holes without puncturing through the material. Forstner bits also leave a smooth bottom finish. If you’re setting barrels in European hinges, Forstner bits are must-haves.
Best Cabinet Face Frame Clamps for Easy Frame Installation 5 Best Cabinet Face Frame Clamps for Easy Frame Installation
Install kitchen cabinets—base, wall and peninsula—using professional techniques. Hanging cabinets is easy and you'll save on your next kitchen remodel. Not all drill bits are the same, by any means. You’ll need an assortment of drill bits if you’re serious about cabinetry. Here are the three common drill sets that you need in your toolkit: You’ll often hear miter saws called chop-saws or cutoff saws. Actually, the word miter refers to making angled cuts for specific joints on frame or trim material. You’ll also hear of different miter saw versions that accommodate blades up to 12 inches in diameter. Here are the common miter saws available to cabinetmakers: While a bar clamp will “flex” as pressure is applied this won’t happen as the screw on the parallel clamp is tightened. Most scribes are metal and use a sharp point to inscribe a prescribed pattern into a new surface. Some scribes have pencil-like points to transfer erasable marks. You can also buy complex scribes that are similar to geometry compasses. With them, you can scribe angles, circles and ovals. 7. High-Speed Hinge Placement Tool
If you’ve tried mounting cabinet drawer slides to drawer and box frames, you’ll know how hard it is to be accurate without help. Magnetic drawer slide mounting tools solve that problem of needing three or more hands to hold the slide frame, the screw and your screw gun.
14 Must-Have Cabinetmaking Tools - York Saw and Knife 14 Must-Have Cabinetmaking Tools - York Saw and Knife
For finished cabinet surfaces (eg. hardware jigs) put blue tape on the jaw to prevent marring the surface Empty the provided fittings into a bowl or keep them sealed in their plastic bags so they don’t get lostHammers and mallets might seem like brute-force cabinetmaking tools. Yes, they’re used for force, but there’s nothing brutal about using hammers and mallets around fine cabinetry. The skill lies in the craftsperson’s hands as well as in the hammer and mallet design. Consider these hammers and mallets for your cabinet shop: If you’re like most people who love woodwork, you’ll have an interest in DIY cabinetmaking. You’ve probably read books on how to make cabinets. And, you’ll likely have watched TV shows and online videos on the subject. Something you’ll see is that cabinetmaking resources emphasize having the right cabinetmaking tools. Level and screw the first peninsula cabinet to the adjoining standard base cabinet. You’ll probably have to fill a 1/4-in. gap with shims before screwing it to the wall studs (Photo 8). If the first peninsula cabinet is only 2 ft. wide, you may have to clamp and screw filler strips to the frame so doors and drawers in the next cabinet will have operating clearance at the inside corner. This should be marked on your plan. When gluing wood panels most woodworkers will opt for inexpensive clamps that offer up a high clamping force and allow for stable gluing. Have the necessary tools for this how to install kitchen cabinets DIY project and other kitchen cabinet projects lined up before you start—you’ll save time and frustration.
Fitting Kitchen Units | Wall Mount Kitchen Cabinets | Wickes
Many cabinetmakers construct their own drilling jigs. As indispensable, must-have tools, drilling jigs help you make reliable, accurate and repeatable holes in your woodwork. They serve as both clamps to secure your work and guides to make sure you drill holes in exactly the right location with the proper angle. Most commercially available drawer pull jigs have multi-position, pre-set hole locations. Most have six standard off-sets as well as a common center spot. These inexpensive tools save you time during tedious pull attaching. 12. Drill Set Add filler strips wherever the cabinets come up short of walls as we show in Photos 4 – 6 or wherever the plan calls for them. Leave the correct gaps for appliances. Some built-in appliances like dishwashers require very exact openings. If there’s one must-have anchor tool for cabinetmaking, it’s the table saw. There are a lot of table saw options available. Making the right choice for your shop can be confusing, but it doesn’t have to be. Here are the main table saw types used for cabinetmaking:Always use cleaning products that are appropriate for your cabinets to avoid damaging the material. You should be able to find guidance on this in your manufacturer’s instructions
Strong Heavy Duty Plastic Kitchen Plinth Clips Kick Board
Misplaced drawer pulls can indicate amateur work and stand out on your cabinetry face. Fortunately, there’s an easy fix when you use a drawer pull jig. Replace the drawers, then rehang the doors and adjust the hinges to align the doors with one another. Conventional Claw Hammer: Nothing replaces a conventional claw hammer when it comes to making cabinets. You’ll use this old wooden-handled, steel-headed tool every day to drive and pull nails as well as gently tapping metal parts into place. Head weights of conventional claw hammers that range from 8 to 16 ounces are best for cabinetmaking. Bar Clamps: These irreplaceable cabinetmaking clamps use a metal bar frame instead of pipe. They combine the strength of a pipe clamp with the depth of a C-clamp. Many shops have a dozen or more bar clamps on hand. Combination squares also serve as protractors and compasses. You can determine flatness or trueness of a cabinet surface with your combination square. Some complex combination squares have dial indicators for minute measurements. Shop Online for Must-Have LUXITE® Carbide-Tipped Circular Saw BladesTwist Drills: These are the standard drill bits you’ll see in every shop. They’re the most versatile, general-duty bits on the market. Twist drills range in size from one-sixty-fourth of an inch up to 1 inch. They’re available in many materials and come in both USA Imperial and Metric sizing. Wooden Mallets: Nothing replaces a wood mallet when it comes to driving chisels or pounding unexposed surfaces together. You can buy inexpensive wooden mallets at any supply house, but many cabinet makers enjoy their homemade models. 14. Combination Square Thanks for asking – you could look at using a shaped piece of wood that matches the recessed line and has a flat side for the clamp to apply pressure. There are deeper throated welding clamps if you need to reach 6 to 12″ into the door. Band Clamps: If you’re assembling large structures like cabinet boxes, band clamps make it easy to wrap and secure your work. Band clamps have malleable fabric straps and ratcheting clamp controls that allow you to carefully squeeze components. Miter saws are must-have cabinetmaking tools, right next to table saws. Where table saws sit rigidly and require feeding woodwork into the blade, miter saws bring the blade to the material. Miter saws aren’t designed for ripping material though. They’re operated by bringing a spinning blade down onto fixed materials.
- Fruugo ID: 258392218-563234582
- EAN: 764486781913
-
Sold by: Fruugo